我觉得单细胞文章发表之后,最好是搭配一个对应的网页方便用户查看数据。毕竟我看到你的文章后,第一个想法可能就是我关注的基因是不是在你的数据集中也有某种特征,而不是我要去数据库上下载你的数据,然后在本地进行处理,最后只为了看个表达量。
因此,我在2019参与发表拟南芥的根的单细胞中就提供了对应网站,当现在已经过去了快6年了,依旧每天都会几个人来看。
我觉得目前发表的很多单细胞文章之所以不提供对应的工作,其中一个很大原因就是按照目前现成工具部署到一个能够被访问的公网服务器上,一年下来是要不少钱的。我找了一圈,也就是USCS Cell Browser是低资源的,他处理完之后就是一个静态页面,直接用NGINX托管就行。但是有一个小小的问题,就是他是通过用户的浏览器渲染,当细胞数比较多的时候,可能会有点卡顿。
当然也可能是我调研不够全,还没有找到合适的软件,我借助目前比较强大的人工智能辅助编程,开发了一个新的工具,可以在非常低资源的情况下进行部署,0.2个CPU,128M内存,可能一天不需要1块钱,就能给自己工作增加一个曝光点。
目前项目开源代码在https://github.com/xuzhougeng/atlasmap-sc。
以课题组之前发表的,被我托管在shiny-server的数据为例,目标是统一托管在https://explorer.plantcellatlas.com 。
我有一台比较高性能的服务器,但是域名是固定的,假设是http://www.example.com,我们可以将其作为计算中心,负责返回前端静态页面的API请求。
在高性能的服务器上,我们做如下的操作
第一步,克隆项目并安装环境
git clone https://github.com/xuzhougeng/atlasmap-sc.git
cd atlasmap-sc

# 配置Python环境
cd preprocessing
uv pip install  .
cd ..
# 配置go环境
cd server
go build -o bin/server ./cmd/server
第二步,运行atlasmap-preproces做数据预处理
uv run atlasmap-preprocess run -i rootatlas.h5ad -o data/ath_root -a -z 11
uv run atlasmap-preprocess run -i shootatlas.h5ad -o data/ath_shoot -a -z 11
uv run atlasmap-preprocess run -i marchantia_census.h5ad -o data/mp_census -a -z 11
第三步,配置data/sever.yaml
server:
  port: 8080
  cors_origins:
    - "http://localhost:3000"
    - "http://localhost:5173"
  # Custom title displayed in the header (optional, defaults to "SOMA-Tiles")
  title: "Cell 1K"
# Multi-dataset format:
data:
  ath_root:
    zarr_path: "data/ath_root/zarr/bins.zarr"
  ath_shoot:
    zarr_path: "data/ath_shoot/zarr/bins.zarr"
  mp_census:
    zarr_path: "data/mp_census/zarr/bins.zarr"
cache:
  tile_size_mb: 512
  tile_ttl_minutes: 10

render:
  tile_size: 256
  default_colormap: viridis
启动后台
server/bin/server -config "data/server.yaml"
第四步,配置后台的nginx,将前端请求反向代理到前端的到go服务器上,并用ngins -s reload重新加载
server {
    # .... other
    # /api (no trailing slash) -> /api/
    location = /api { return 301 /api/; }

    location /api/ {
        proxy_pass http://127.0.0.1:8080/api/;
        proxy_set_header Host $host;
        proxy_set_header X-Real-IP $remote_addr;
        proxy_set_header X-Forwarded-For $proxy_add_x_forwarded_for;
        proxy_set_header X-Forwarded-Proto $scheme;
        proxy_read_timeout 300s;
    }

    # /d (no trailing slash) -> /d/
    location = /d { return 301 /d/; }

    location /d/ {
        proxy_pass http://127.0.0.1:8080/d/;
        proxy_set_header Host $host;
        proxy_set_header X-Real-IP $remote_addr;
        proxy_set_header X-Forwarded-For $proxy_add_x_forwarded_for;
        proxy_set_header X-Forwarded-Proto $scheme;
        proxy_read_timeout 300s;
    }

    # 可选:健康检查直通
    location /health {
        proxy_pass http://127.0.0.1:8080/health;
    }
    # ... other
}
配置前端:
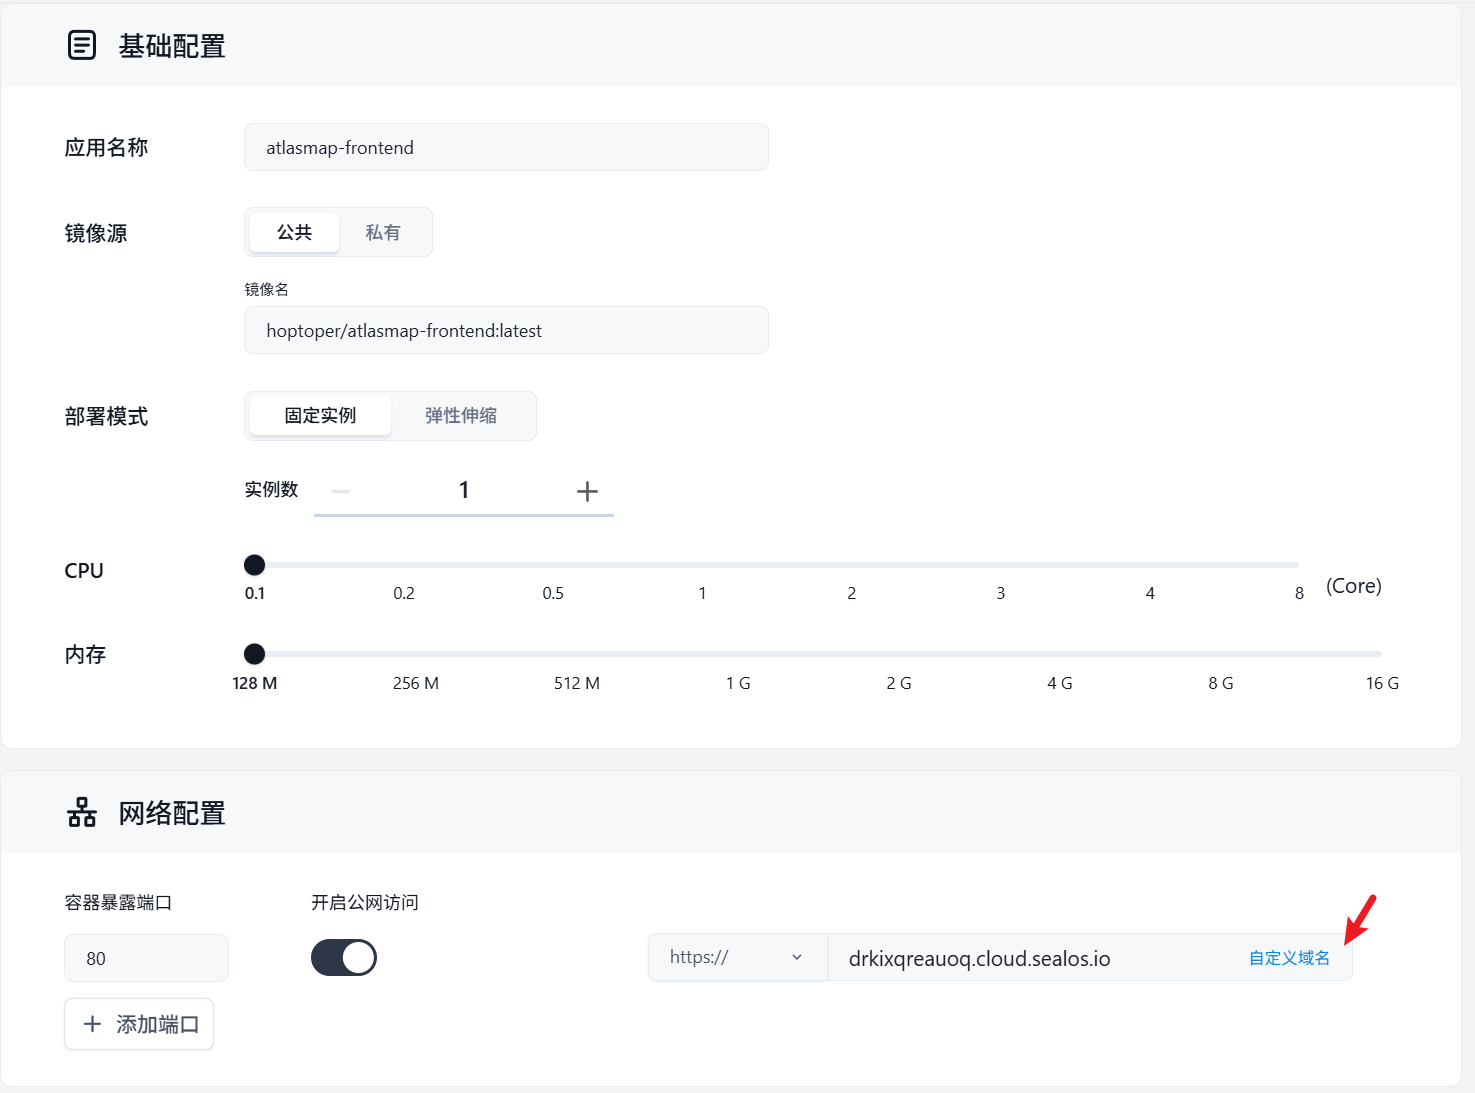
我用的是环界云https://cloud.sealos.io/提供谷歌云,直接用配置好的镜像:hoptoper/atlasmap-frontend:latest, 最低配置,一天不到5毛钱。
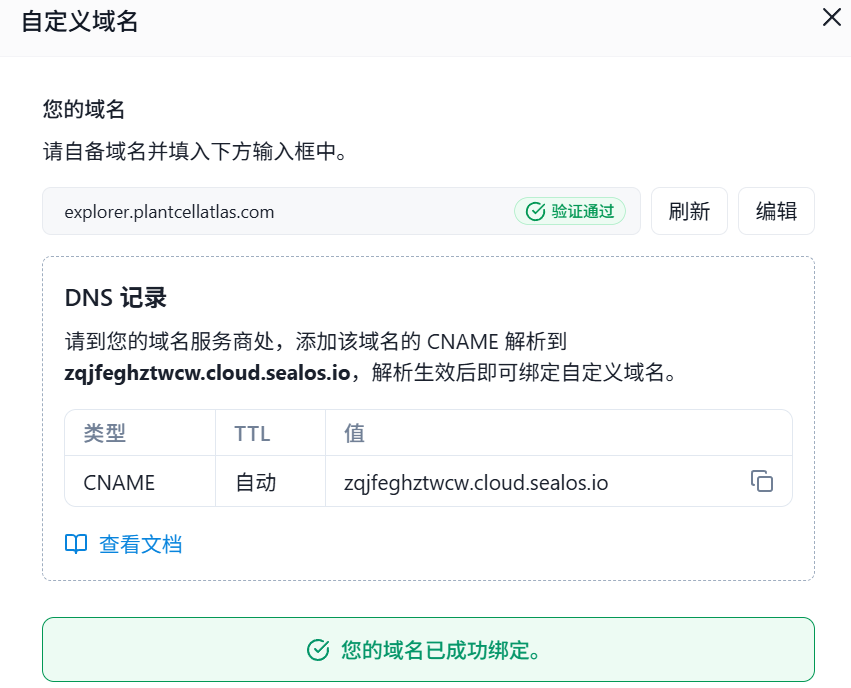
通过CNAME的方式实现自定义域名。
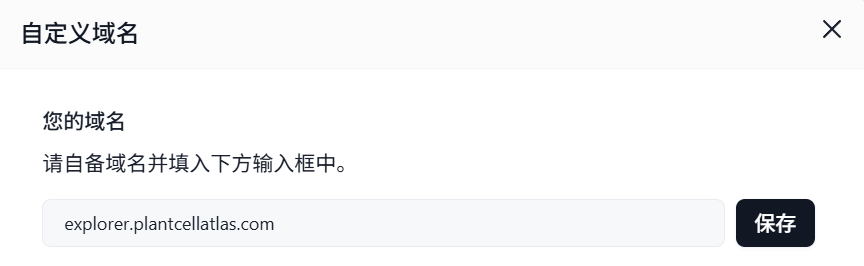
保存的时候,提示你应该如何到域名服务上设置CNAME解析,这里面的值就是你需要复制过去的。
高级配置中,设置环境变量 BACKEND_HOST, BACKEND_PORT, 对应后台服务器NGINX配置的server_name 和listen。

启动等待一会就可以了,就可以通过域名https://explorer.plantcellatlas.com/访问了,终于实现了我的单细胞数据统一化展示了。
